Tag Archives: help

Gear Up! Lensbaby Composer Pro Review

image

Everything you need to know about this creative secret weapon. Plus! Five tips to help you master the Composer Pro!

Why follow the rules of photography, when it’s so much more fun to break them? Lensbaby has the perfect range of tools for any photographer looking to break the artistic boundaries of the photographic world. For giving scenes that added edge of creativity, look no further than the Lensbaby Composer Pro.

Lensbaby optics are perfect for really putting a creative spin on things. With the ability to swap interchangeable optics in a lens, such as Soft Focus, Pinhole, and Plastic, the possibilities for creating unique scenes is endless. The Composer Pro is specifically built for creative photograhers who really like to make scenes their own with their own expressions.

image

We’ve given the Composer Pro with the standard Double Glass optic a place in our gear bag to see just how well this lens really works. Much like a Fisheye or Macro lens, the Composer Pro gives photographers a whole new perspective with which to view the world.

Who is it for?

The Composer Pro is perfect for photographers who love to have fun with their work. The lens appeals to those who love to change their perspective, snap unique captures, and see how far they can take their creative freedom. Whether you are professional, hobbyist, or anything in between, you can definitely enjoy the Composer Pro.

HARDWARE

The Composer Pro feels sturdy in hand, as the plastic body feels solid, and the two focal and locking rings are a nice, grippy rubber that makes adjustments easy to make. The focusing action, though strictly manual, is smooth. There may be a minute amount of fidgeting towards the nearest focusing distance and infinity, but this depends on the optic being used, and never posed any sort of issue for us.

The 2nd ring on the Composer Pro locks the focal plane into place. After unlocking the ring, the lens can be shifted and tilted in all directions. Tightening the ring will lock the lens in its position.

The Composer Pro, with metal mount, fits our Nikon D90 like a glove. The reference dot for lining up the lens is on the bottom of the Composer Pro, right on the metal mount. There are no reference points on the sides of the lens, which can make mounting the lens a bit difficult sometimes. The trade-off for this is that the Composer Pro does look more sleek and streamlined once it is mounted to the camera, as it is free of any extraneous markings and labels.

image

Lensbaby Optics make use of a specialized tool to change manual aperture rings. This may be a nuisance at first glance, but is actually one of Lensbaby’s strongest assets.

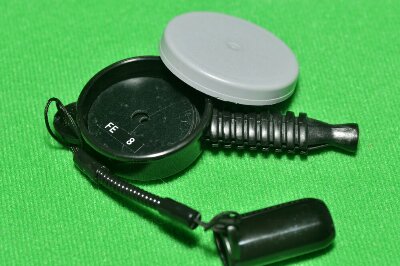
Lensbaby Optics use their own unique lens caps. These caps are solid, springy, and feel quite tough once they are in place. This is a blessing, since replacing a lost cap won’t be as easy as it would be for a standard cap.

Changing optics is actually quite easy, and with a few minutes practice, can be done in a just a few seconds. The Optics contain the glass through which the image passes, while the Composer Pro is the outer shell that mounts the Optic to the camera body. There are many Optics to play with, and many of those Optics allow the use of Creative Aperture Filters. We’ll cover more on that shortly!


image Continue reading


7 Tips to Master Your Fisheye Lens

Beauty lies in the fisheye of the beholder. Follow these tips to get the most out of your fisheye lens!

Every photographer strives to take the best photos he or she possibly can. Part of taking a great photo is being able to exercise creative freedom. When it comes to the Fisheye Lens, benefits such as low light shooting, wide angle perspective, and beautiful barrel distortion set it creatively apart from any other tool.

Like any other lens, the Fisheye Lens has its own unique strengths and uses.

Fisheye lenses allow us to see the world in a new perspective.

With a fisheye lens in hand, you can turn ordinary scenes into creative playgrounds, and turn beautiful scenes into works of art! Keep these tips in mind to really make the most of your fisheye lens:

Continue reading


5 Easy Tips to Improve Shooting a Long Lens

canon500mmA few small techniques can make the difference between a casual snapshot and a true keeper.

Shooting a long lens can seem daunting to those who have yet to try it, and even more so frustrating for photographers who have just started snapping shots from afar. Of course, nothing beats practice and understanding proper technique, but with a few little tricks, mastering the use of a long lens doesn’t have to be so frustrating.

Tip 1: Use proper tools for stability

It may seem common sense to shoot with a tripod, but there situations where the ground may not be so accommodating, or photographers must be on the constant move. In many instances, tripods are just too unwieldy and behemoth to carry around. The use of a sturdy monopod can make all the difference when a tripod just doesn’t fit the situation.  Monopods are small, easy to carry, and can be adjusted much more quickly than a tripod.

stedi-stock_camera_stabilizer

Stedi-Stock camera stabalizer.

In rare cases when both a tripod and monopod are out of reach, and maximum mobility are of utmost importance, try shooting with a “Stedi-Stock”, which allows a photographer to use the upper torso for a convenient boost to stability. The shoulder-stock for the camera uses a standard, universal tripod-mounting system, can be easily stowed away, and is light weight.

Flexible Gorilla Tripod

Flexible Gorilla Tripod

When shooting in awkward positions or low to the ground, the use of a “Gorilla-Tripod” may be precisely what the doctor ordered. These flexible, lightweight tripods are quick and easy to manipulate, taking any shape you require. This tool is invaluable for stabilizing the camera in difficult situations.

Tip 2: Shoot like a Sniper; Breath and Trigger

A sniper shooting a rifle takes the utmost care with each shot, having strict technique when it comes to breathing and pulling the trigger. While photography is a completely different field than firearm shooting, great techniques can still be shared between the two sports.

When a sniper fires a rifle, he minimizes vibration and movement of the firearm using strict breathing technique. This valuable technique can be applied to photography as well. Before ‘pulling the trigger’, slow down your breathing, and take a deep inhale and exhale. Between inhaling and exhaling, there is a moment when body movements are minimal. Relaxation is the key to stabilizing movements. Within the ten second gap of inhaling and exhaling is the best time to take the shot.

Aerial Camera Gun

Continue reading